Tips For Saving Water In Residential Landscapes

Water is the strongest element of nature. It may seem as though we have plenty by looking into the ocean, rivers and lakes but in fact each year our water supply decreases due to not enough rainfall. We ourselves can help with wastage of water.

Here are 10 simple ways you can save water around the home;

  1. Firstly instead of watering down a driveway or sidewalk use a broom to remove all leaves and debris.
  2. Water your gardens in the early hours of the day or even late at night. This will reduce the amounts of evaporation that occurs.
  3. Use a specific nozzle on the hose that will switch off when water begins to leak.
  4. Try not to use a large amount of fertilizer on the lawn. Fertilizing requires loads of watering on a daily basis.
  5. Try to only water the grass every 4 to 7 days in the warmer months and 9 to 14 days during the colder months. This is all that is recommended.
  6. If you have water feature in your landscaped garden try to use a water system that recycles the same water. By doing this you are saving bucket loads of water.
  7. If you have a swimming pool in your yard consult your nearest pool retailer on purchasing a water saving pump.
  8. Never leave a sprinkler unattended. You may forget that it is switched on and let it run for hours. Sprinklers can waste gallons of water in a minimal amount of time.
  9. Try and plant flowers that do not require regular water.
  10. Use mulch that will retain moisture in the soil, saving you the hassle of watering it all the time.

Landscaping and Water

Landscapes main source of life is water. Landscapes thrive and survive off water. Without water there’d be no way flowers, trees, plants and grass would survive especially in high temperature areas.

The amount of water you feed your landscaping will depend on;

  • How large the area is.
  • Which type of grass you have.
  • What type of flowers and plants you have.
  • What type of lawn maintenance is needed?

Standing in your landscaped garden with a hose watering your plants can take up to hours when doing both the front and back areas. You will also be wasting a lot of water that could be used sensibly some where else.

Why Not Install Your Own Irrigation System?

An irrigation systems installed in your residential home will help with the maintenance of you wonderfully landscaped gardens. There are several types of irrigation systems.

Drip Irrigation System

This type of system is more suited to residential properties with smaller yards and landscaped gardens. Drip irrigation is suited for the watering of plants, flowers, trees and shrubs. They can b e installed right at the roots of the plants and flowers. Drip irrigations water flow is slow and drip like. It delivers the right amount of water daily, weekly or monthly without the wastage.

A drip irrigation system is easily installed just below the surface of the ground. Small trenches need to be dug out to insure that the system in secure. They can be set by a timer giving you the opportunity to have the gardens watered when you please.

Choosing the Right Irrigation System

Choosing the right irrigation system for your home or farm can be a tough choice. It is an important decision so of course you need to research the many different types of irrigation systems to find out which will best suit your needs. There are many components which make up an irrigation system, things like;

  • Sprinklers
  • Panels
  • Taps
  • PVC tape
  • Pipe’s
  • Pumps

Irrigation systems do not come assembled ready for installation. You can choose which type of components you would like to include in your system that will help you save water (most importantly), time and money.

Hopefully this information we have provided you with is helpful. So visit your local retailer who specialises in landscape irrigation systems and you too can help save water!

Posted in Uncategorized | 1 Comment

Laying Patterns For Your Paving Installation Project

The Many Types of Pavers

There are 3 main categories of pavers. These include;

  1. Concrete
  2. Natural
  3. Stone

Concrete pavers are man made and processed in factories all around the world. Their main ingredients are; cement, sand and water.

Natural pavers are found in rivers, lakes, beaches and many other natural places. They are produced over millions and millions of years by breakdowns and erosions. They are found they quarried and cut to a pavers shape. Some natural types of pavers include; sandstone, limestone, cantera stone, marble, slate and bluestone.

Stone pavers simply consist of all types of pavers like, brick, concrete and natural stone pavers.

Laying Patterns for All Types of Pavers

Installing your own paved area can be a fun job, especially if you know what you are doing.

Here is some helpful information on the several types of laying patterns you can choose from today to enhance the look of you paved area.

The Herringbone Pattern

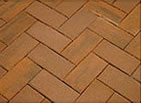
The herringbone is the most popular laying pattern that is being used nowadays. It is widely seen on many applications but predominately on driveways. It is a laying pattern that will break up a large area making it seem a reasonable size.

This laying pattern is made by placing one paver on a 45 degree angle and the next paver should be placed at a 90 degree angle, you then continue on placing on by one at the same angles. There are no complications as to laying this pattern and it is easily installed by anyone.

The Parquet Pattern

The parquet pattern is another popular laying pattern for driveways. But really it’s all up to your own personal tastes. Parquet is a pattern that is laid by 2 pavers being placed parallel to each other at a 90 degree angle, then the next 2 pavers are still parallel to each other but they are placed in a 45 degree angle. Continue on with this same style and the outlook becomes very elegant and stylish.

This laying pattern is ideal for residential pavements as well as commercial. It can be easily installed by you anywhere around the home. It can be installed onto smaller areas in no time at all.

The Running Bond Pattern

The running bond pattern is widely seen and transformed from residential homes to pavements. It is another one of the most popular laying patterns and one of the most basic that is still being widely used today. Some applications where it is mostly seen are; driveways, walkways, sidewalks and patios.

This laying pattern is made by easily placing a paver as it is and the next paver is placed by its side. It’s a flowing pattern. To make sure that you are paving in a straight line just simply add some string to the ground and set it up in straight lines which will help you pave straight.

The Serpentine Pattern

For this laying pattern circular or squared shaped pavers are needed (the shape of a paver is the most important value as it will result in the right laying pattern.)

The pavers are laid in circular patterns creating a slithering type look. This pattern is easily laid by the do it yourselves out there. This is the ideal laying pattern for a patio.

Random Patterns

Why not choose your own individual style of laying pattern. You can choose from the many shapes pavers can be cut to and create your own stylish and unique laying pattern. Random patterns are simply done by placing a paver in any particular way as you then do with the next paver. You can make them interlock or just be side by side. The choice is yours so get creative!

Now that you have some useful information and a general idea on how to laying pavers in the most common laying patterns why not start your installation project! You will be surely satisfied with the outcome.

Posted in DIY, Paver Paterns | Comments Off on Laying Patterns For Your Paving Installation Project

Considering Adding a Landscape Pond?

Ponds that are featured throughout landscaping can add serenity and trickling water sounds around the garden that will be peaceful and enjoyable. A pond is a body of water surround by tree’s, leafs and rocks. A pond can be as big or as small as you like. They can be featured anywhere throughout your landscaped garden.

A pond is also a place for wild animals like fish, ducks and birds to come and enjoy, feed, breed, bath and play in the water.

The ideal pond for you can be created. Why not choose to make your own pond by doing it yourself!

Buying a Pond Pack

You can visit your nearest pond retailer and they will assist you with purchasing all the right components that you will need to build your own backyard pond. You can purchase a pond pack which will include all of the specific materials that you will need. If you’re experienced in building ponds you may only need to select fewer items to construct your landscape pond.

Landscape Ponds and Fish

Have you ever wondered what it would be like as a fish? Swimming around all day in the water getting fed and sleeping in the water, what a life!!! Fish normally live in ponds along with frogs and tadpoles.

By building your own landscape pond and adding several types of fish to it you will be able to keep a close eye on them and see their journey’s and enjoy the peaceful feel that they bring to your landscape. They can beautify the pond and add elegance, making it a wonderful feature to add to your property.

PLANNING TO BUILD A LANDSCAPE POND

Where will it go?

Careful planning should always be conducted when you are doing a project by yourself. Choosing a position for the landscape pond should be your first step. Do a rough sketch of how you would like the overall look to be. Remember ponds that are closer to your home can seem fake and formal where as ponds that are placed throughout landscaping seem more natural and blend in.

Choosing the Right Size

Once you have chosen a site the next step is what size you would like. The first consideration should be how much space you have in the area you have decided on. The best recommendation is to use a piece of string placing it in the shape you would like to see your landscape pond in. Remember, the larger the pond, the more maintenance that is needed.

Careful Consideration and Planning Tips

1. A landscape pond needs to be in full view of the sun, especially where aquatic plants and flowers are being used. Most of them require lots of sunlight.

2. Avoid areas where large trees are in. Their fallen leaves can kill marine life that lives in the pond.

3. If the underlying soil beneath the pond is moistened it will result in the pond shifting and lifting.

4. Consider that the pond at one stage will need to be re filled most likely in the warmer weather. Make sure it has access to fresh water to be filled up by the pumps.

5. Make sure you inspect the underlying area where the pond will be placed for cables, electricity and other communication lines.

6. Consider the safety of all young children that will past by this beautiful area.

Hopefully this article has helped you consider building your own landscape pond there are many benefits of having a landscape pond so create your own piece of beauty and enjoy the many wonders of your own built landscape pond.

Posted in Uncategorized, Water Features | Tagged , | Comments Off on Considering Adding a Landscape Pond?

All Pavers Lead to Rome

An in depth look at the World’s First paved roads, which by AD 117 had grown to over 80,000 KM and spidered all throughout Europe. 

Three Types of Road

In planning for accommodating the various types of traffic and amount of effort involved the Roman Empire devised three types of roads to be used. One: simply leveled earth, the other: gravel paths with pavers on top; and lastly: deeply excavated roads (five layers) with pavers and cement on top.

Via terrena

These roads required no construction or preparation, they were merely paths in the earth caused by continous traffic by foot and carriage. They of course had the problem of becoming pure mud should there be sufficient rain or snow.

Via glareata

The first actual type of constructed road by the Romans, the Via Glareta consisted of an earthed path (about 6 inches) filled in with coarse gravel and then either a finer gravel on top of that or paving stones. (Comparable somewhat to the American ‘macadam’ which was ‘invented’ so to speak in the early 1800s).

Via munita

This is the classic Roman road as we know it and is closest to our modern day paver/paving stone pathways. The Via Munita was an intricate set up, with seven component parts, five of them be actual layers in the road itself, and the remaining two are for edging and shoring. Although the width varied it was typically two meters and it would arch and reach a slight apex in the center. This served to prevent the road from retaining water and pooling.

Two Thousand Years Later

It is humorous and rather unimaginable that nearly two thousand years after the development of this technology and its omnipresence throughout Europe, that you would still see cities without the slightest semblance of a road. Take for instance 1919 the Washington Richmond Road, 30 miles south of D.C. this major thoroughfare was just dirt and mud!

Posted in Paver History, Types of Pavers | Comments Off on All Pavers Lead to Rome

Pavers of the World

Although paving stone roads originally came from Egypt over 5000 years ago, they wasted no time immigrating to virtually all countries of the world. Old fashioned paved streets can still be seen today in many cities of the world, standing the test of time.

Today we take a look within and beyond our borders, across the pond to see the paved streets of the world.

Cobblestone

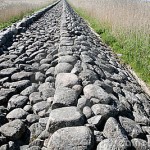
The pre-cursor to what you would normally consider a paving stone road, cobblestone distinctly has round stones mortared together. Protruding up several inches they make for a very bumpy surface indeed.

They made their debut on the world stage in the 1700s but were quickly phased out and replaced with more smooth and practical ‘granite setts’ in the late 1800s; (so much so that it is rare indeed to find an old cobblestone road in modern times).

(Right) Small and rather uniformly sized cobblestones in Italy. The theory behind this shape and pattern is improved traction for horses.

(Right) Large, coarse cobblestone road.

Granite Setts (Belgian Block)

Often mistaken for cobblestones, granite setts are quarried, cut and shaped to whatever specification desired. Granite setts are mortarless and are set with sand; as opposed to cobble stones which are simply round natural stones set in mortar.

Unlike cobblestones, roads made out of granite sett are still found throughout the world, especially in a larger city’s ‘old’ or ‘historical’ district. However not all Belgian Block roads are from the days of old. Many municipalities (especially those in Europe) actively build new roads in Belgian Block, in order to achieve an atmosphere of old world charm.

Belgian Block roads have also gained a reputation for various bicycle races in France, as being the most difficult and pivotal point of the race (due to the difficulty of cycling on their surfaces)

Possibly the most creative applications of Belgian Block can be found in far off Lisbon, Portugal, where you can throw a stone without encountering some for of aesthetic paver sidewalk, street or square.


Posted in Uncategorized | 4 Comments

A Paver’s Dream

It goes without saying that many a paver has wished for some kind of machine to lay his pavers for him. Especially while doing something repetitive and uniform, such as a long driveway with no curves.

Well dream no more, for that fateful day has come! Dutch company VANKU BV has revolutionized the commercial paving industry with their ‘Tiger Stone’. This six-meter wide machine creeps along at a slow pace, leaving under it perfectly laid and arranged pavers.

While the Tiger is not necessarily something a home owner could benefit from (unless they had a very long driveway indeed), contactors and municipalities would very well with one of these machines for roads and streets.

The Tiger touts being able to lay at maximum 980 square feet of pavers in one day which is over two times the amount an experienced crew is capable of laying (the average being around 400 square feet a day). That includes even edging pavers!

Remarkably the Tiger’s machinery is rather simple and easy to maintain. Pavers are fed in and arranged by hand, they then slowly slide down at an angle and plop into place, and that’s it!

All of this begs the question… How much does it cost? Well that depends on the model. The machine comes in 13, 16 and 20ft widths and prices are from $81485 to $108655 respectively.

Check out the machine in operation:

Tiger Stone


Posted in Uncategorized | Comments Off on A Paver’s Dream

Affordable Pavers

Not every home owner has the same budget therefore some creativity will be required when tighter budgets can make installing conventional hardscaping and pavers a challenge. Certainly not everyone can afford natural flagstone pavers hand chiseled from the quarries of Connecticut!

For those who want to employ some kind of hardscaping application but are tight on cash, there are solutions (whether it be a commercial or residential paving project).

So what’s the Best Solution?

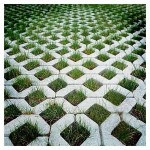
Permeable Pavers! Permeable pavers are precast concrete pavers, which can come hollowed with a diamond-hole in the center, resembling a cinderblock (however that is a crude way to put it). Because these pavers are precast concrete the cost is considerably lower than natural stone or even clay brick pavers. Also, the fact that the paver itself has 20% less volume (due to the hollow centers) that even further lowers the cost.

Permeable pavers can be used in various applications including, but not limited to: driveways, parking lots, walkways, patios and more. Home and business owners should rest assured knowing that even though these pavers are hollow (they get filled) they can fully support the weight and pressure of automobiles with no problem.

The filling for the two hollow diamonds can be covered with gravel or for something more natural and attractive, you can use grass.

How much can you save?

A rough calculation on savings with some permeable concrete pavers compared to solid pavers would be approximately a savings of 30% to 50%. For example; you could pay over $10.00 per square foot for a solid flagstone paver, or under $5.00 per square foot for a concrete permeable paver.

This really adds up if you have a sizeable project requiring considerable square footage, a parking lot for instance, or a large driveway.

To learn more about permeable pavers and their many benefits, read up on it at:

http://www.paversearch.com/permeable-pavers-menu.htm

Posted in Budget | Comments Off on Affordable Pavers

The History of Pavers

One of the World’s Oldest Professions

While it may not seem like it at first glance the paving industry is in fact one of the oldest professions in the world, dating back as much as 5000 years. Although it certainly is likely to extend back even further, the earliest known record is from about 2600 BC in Egypt.

Although paved roads have been around for 5000 years it wasn’t until 500 BC when the Roman Republic began cutting 6 sided hexagon pavers for roads. Until this time paver shapes were random and natural. The Roman engineers would dig a deep bed and fill it with crushed stone and sand, and lastly place the pavers. This technique and the hexagonal paver then continued on unchanged for 2000 years.

The most remarkable aspect of this is after thousands of years of weather, wars, and other elements these roads of pavers are still there, intact (albeit a little worn down) and fully functional. Which leaves one begging the question: “how long do paver roads last?” We have yet had enough history to hazard a guess.

Modern Pavers

It wasn’t until after the Second World War did we see a significant change in the paver world. With the introduction of concrete pre-cast pavers companies were able to drastically reduced costs in the application of pavers, a barrier which had limited the use of paver roads since the beginning (however mass production had not yet begun).

Concrete pre-cast pavers also insured that all pavers would have a completely clean and smooth surface, making vehicle and foot traffic much more agreeable.

In addition to the control of their size and shape, an aesthetic factor entered the picture, with a choice of various colors for the concrete pavers. From red and green to dark blue and light brown.

The last development came from Germany in the 1960s, with the mass production of concrete interlocking pavers which then markedly increased its accessibility and affordability as a driveway/road application.

Posted in Uncategorized | Comments Off on The History of Pavers

Installing Pavers on the Cheap

Summer is in full swing now, and with home owners spending more time outside enjoying the sun, some find themselves wanting to spruce things up and make their backyards more aesthetically pleasing with some hardscaping; a paved patio or winding paver walkway, for instance.

However, not everyone has the budget for big extravagant landscaping projects. So what is one to do? Well roll up your sleeves, put on your gloves and jeans ‘cause it’s time to tackle that yard project you’ve always wanted to do and lay some pavers!

While not an extremely complex procedure a paving Di-It-Yourself (DIY) project should not be undertaken without the recognition that a lot of patience will be required, and you may have to re-do certain steps until satisfaction is achieved (lest you want a wobbling pavestone walkway). Instant gratification has no place here, and must go straight out the window! (Especially if it is your first paving adventure)

After preparing oneself mentally, the next step would be to research the Internet and view several Youtube video tutorials over and over until you can get a general idea of the task at hand. You’d be surprised at how simple it can be to install a paver project by yourself.

A recommended video of a small paver patio installation is:

Do note that you will be digging approximately several inches deep into your lawn, so you will have to be prepared for some physical exertion, especially if your patio or walkway is larger than sixty four square feet.

Certainly the easiest project would be a square or rectangular patio (as was in the above video), as opposed to a winding paver walkway, which would be more difficult to dig out and measure. If it is your first paver project it is recommended that you go easy on yourself and pick a simple project.

For supplies: you’ll need rock gravel for the base, then sand on top of that, then interlocking pavers. In the above video example, the cost of the materials they used were under $200, not bad at all! So with a few bucks and some determination you can give your backyard a really nice face lift.

For more information about installing pavers, please visit paversearch.com:
http://www.paversearch.com/installing-patio-pavers.htm

Posted in DIY, Paver Walkways | Tagged , , , , | Comments Off on Installing Pavers on the Cheap

The Benefits Of Interlocking Concrete Pavers

Using Interlocking Concrete Pavers around the Home

Interlocking concrete pavers are being commonly used for all types of pavements around homes today. Especially in areas such as;

1. Driveways

Driveways require a material that is strong, durable, flexible and weather resistant. Heavy vehicles pass on a driveway several times a day, as doe’s foot traffic. Interlocking concrete pavers are the ideal choice for this type of application. They are available in a wide variety of colors, shapes and finishing textures. There are also many interlocking laying patterns for you to choose from.

2. Walkways

Walkways can be situated anywhere around the home. A walkway can lead to the entrance of your home, the landscaped area, the patio and the pool area. A pavement material that is used on a walkway also needs to be durable, strong, flexible and weather resistant. Interlocking concrete pavers offer all of the above.

3. Patios

A patio is a place where you, family and friends can gather to enjoy a nice meal, barbeque or just a simple get together. Many people have lovely furniture and landscape ornaments placed in the area of their patio. Interlocking concrete pavers are the perfect choice for the flooring on a patio. They will not be scratched by the movement of furniture or ornaments. They are available in many exclusive colors which can add beauty and compliment you furniture.

4. Pool Areas

Interlocking concrete pavers are an ideal application for you pool surrounding. They can be made to any color, shape and size you may require. Interlocking concrete pavers are water resistant and slip resistant which is required by law nowadays for any type of pavement used around pools.

They will not be damaged by the affects of the sun like UV rays. Salt water and chlorine will not affect the colors or qualities of interlocking concrete pavers.

Maintenance of Interlocking Concrete Pavers

The maintenance of interlocking concrete pavers is very low. Occasionally you may be required to replace a chipped or cracked paver which is very rare due to their durability. The darker colored types are ideal for driveways where oil stains may occur because they will hide the stain. There are special types of cleaning solutions that can be used to remove heavy stains such as;

•Food
•Oil
•Petrol
•Grease and Grime
•Dust and Debris

Interlocking concrete pavers do not have an opened joint so weeds can not grow in between the cracks.

General maintenance procedures like, sweeping and hosing down can be done at least once a week by you. It may also be wise to inspect the pavers frequently to ensure there are no damages that may cause harm.

The Many Benefits Interlocking Concrete Pavers Offer

•Available in a wide selection of colors, patterns, shapes and sizes.
•Can be applied anywhere.
•Add and offer beauty to landscaped gardens
•Durable and Flexible throughout freeze and thaw cycles.
•Salt resistant and slip resistant.
•Efflorescence is manageable
•Can be installed by a home owner or professional
•Darker colored pavers will help with the melting of snow much quicker.
•Are easily repaired
•Wont crack like concrete slabs
•Low maintenance required

As you can see, Interlocking Concrete Pavers have so many benefits, which is what makes them such a popular choice not only for homeowners, but also for designers, architects and contractors!

Posted in Paver vs. Concrete | 1 Comment